Android Studio Setup for Flutter Development

Android Studio is one of the popular apps developed by Google itself to create cross-platform Android applications. You have to install Android Studio version 3.0 or later.

Install the Flutter and Dart plugins :

After the successful installation of Android Studio, you have to install Flutter and Dart plugins. 

Step-by-step implementation


Step 1: Start Android Studio.

Step 2: Open plugin preference (Configure > plugins as of v3.19.2)

Step 3: Select the Flutter plugin and click Install.

Step 4: Click to Restart when prompted.


Creating the application: 

After installing Dart and Flutter plugins create a Flutter app. Follow the steps mentioned below.

Step 1: Select a new Flutter project new> new Flutter project.

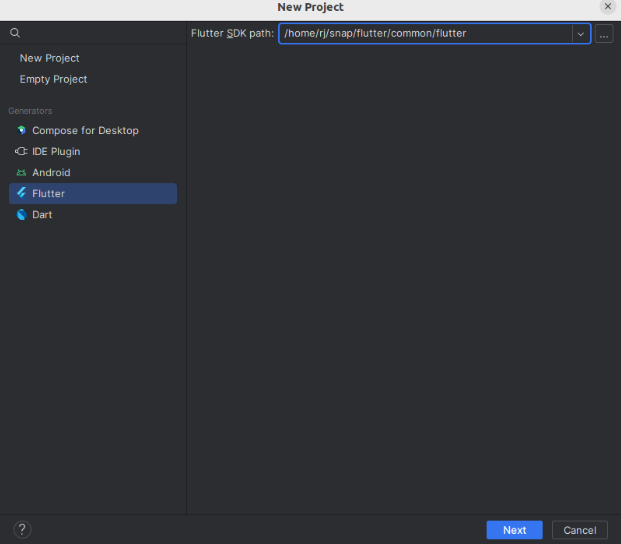
Step 2: Select Flutter and next click check the below image.


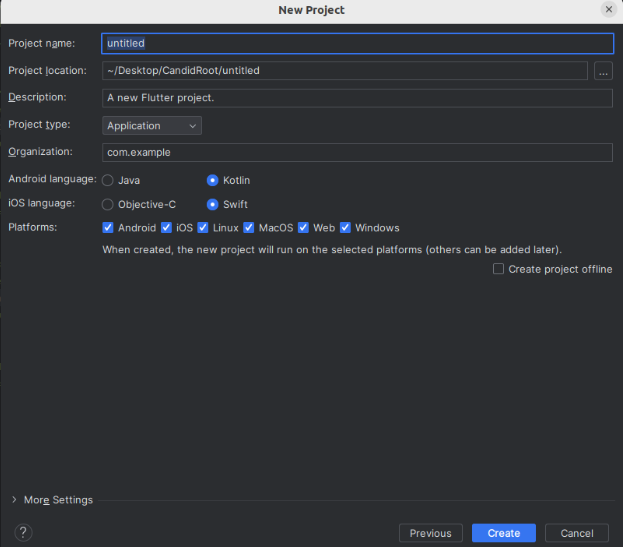
Step 3: Select Flutter and next click open the below dialog also select platforms like Android, iOS, etc.


Step 4: Below IDE  of flutter created project.


Step 5: 

Flutter project > libs > main.dart

void main() {

runApp(const MyApp());

}


class MyApp extends StatelessWidget {

const MyApp({super.key});


// This widget is the root of your application.

@override

Widget build(BuildContext context) {

return MaterialApp(

title: 'Flutter Demo',

theme: ThemeData(

colorScheme: ColorScheme.fromSeed(seedColor: Colors.deepPurple),

useMaterial3: true,

),

home: const MyHomePage(title: 'Flutter Demo'),);}}

class MyHomePage extends StatefulWidget {

const MyHomePage({super.key, required this.title});

final String title;

@override

State<MyHomePage> createState() => _MyHomePageState();

}

class _MyHomePageState extends State<MyHomePage> {


@override

Widget build(BuildContext context) {

return Scaffold(

appBar: AppBar(


backgroundColor: Theme.of(context).colorScheme.inversePrimary,


title: Text(widget.title),

),

body: const Center(

child: Column(

mainAxisAlignment: MainAxisAlignment.center,

children: <Widget>[

Text(

'Welcome Flutter',

),],),),);}}

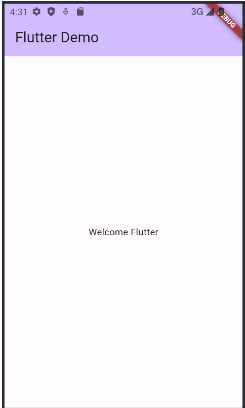
Step 6:  After that, run the application.


Happy Coding!


365Bloggy May 8, 2024
Share this post
Tags
SUBSCRIBE THIS FORM


Archive