Drawer Widget in Flutter

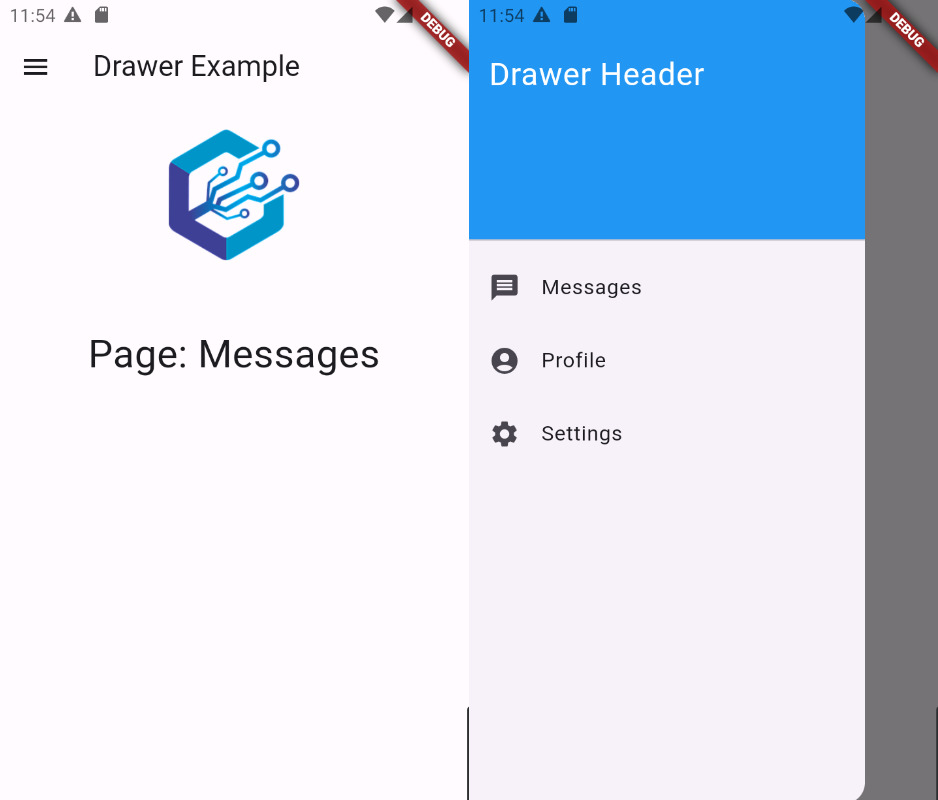
The navigating app drawer is divided into three sections namely header,body and footer.drawer inside many items in the list and click on item then open particular screens.All children of drawer widget are usually in the ListView of Mobile application.

Properties

  • hashCode: The hash code for this object
  • Key: widget replaces another widget 
  • runtime type : runtime type of the object.
  • elevation: z-coordinate at which to place this drawer
  • sematiclabel:  semantic label of the dialogue

Constructors:

Syntax

 Drawer({Key key,Widget child,double elevation:40})

Step-by-Step Implementation


Step 1: Create a New Project in Android Studio (File >new flutter project).


Step 2: Adding material package

Import method the runApp method in the main function call first while run the application.

 import 'package:flutter/material.dart';

 void main() {

     runApp(RunMyApp());

 }

Step 3: Creating a stateless widget

 We can create a stateless widget that contains MaterialApp widget,AppBar,etc.

 class RunMyApp extends StatelessWidget {

     const RunMyApp({super.key});  

    @override

    Widget build(BuildContext context) {

    return MaterialApp(home);

     }

 }

Step 4: Below code write of drawer widget in a flutter.
 drawer: Drawer(
child: ListView(
)
)
Step 5: Final code 
 import 'package:flutter/cupertino.dart';
import 'package:flutter/material.dart';

void main() => runApp(const DrawerApp());

class DrawerApp extends StatelessWidget {
const DrawerApp({super.key});

@override
Widget build(BuildContext context) {
return MaterialApp(
theme: ThemeData(useMaterial3: true),
home: const DrawerExample(),
);
}
}

class DrawerExample extends StatefulWidget {
const DrawerExample({super.key});

@override
State<DrawerExample> createState() => _DrawerExampleState();
}

class _DrawerExampleState extends State<DrawerExample> {
String selectedPage = '';
GlobalKey<ScaffoldState> _scaffoldKey = new GlobalKey<ScaffoldState>();
toggleDrawer() async {
if (_scaffoldKey.currentState!.isDrawerOpen) {
_scaffoldKey.currentState?.openEndDrawer();
} else {
_scaffoldKey.currentState?.openDrawer();
}
}
@override
Widget build(BuildContext context) {
return Scaffold(key: _scaffoldKey,
appBar: AppBar(

title: const Text('Drawer Example'),
),
drawer: Drawer(
child: ListView(
padding: EdgeInsets.zero,
children: <Widget>[
const DrawerHeader(

decoration: BoxDecoration(
color: Colors.blue,
),

child: Text(

'Drawer Header',
style: TextStyle(
color: Colors.white,
fontSize: 24,
),
),
),
ListTile(
leading: const Icon(Icons.message),
title: const Text('Messages'),
onTap: () {
setState(() {
selectedPage = 'Messages';
toggleDrawer();
});
},
),
ListTile(
leading: const Icon(Icons.account_circle),
title: const Text('Profile'),
onTap: () {
setState(() {
selectedPage = 'Profile';
toggleDrawer();
});
},
),
ListTile(
leading: const Icon(Icons.settings),
title: const Text('Settings'),
onTap: () {
setState(() {
selectedPage = 'Settings';
toggleDrawer();
});
},
),
],
),
),
body: Center(
child:Column(children: [
Container(
height: 20.0,
),
Container(child:Image.asset(
"assets/images/company_logo.png",
width: 100
)),
Container(
height: 50.0,
),
Container(child:Text('Page: $selectedPage',style: TextStyle(fontSize: 30),))
],) ,
),
);
}
}
Step 6: Output of above example 


Happy coding!


365Bloggy June 12, 2024
Share this post
Tags
SUBSCRIBE THIS FORM


Archive