How to add a Snackbar in Android

Snackbar offers brief commentary on an activity. On smaller devices, the notice shows at the bottom of the screen; on larger ones, it appears lower left. Above every element on the screen is the Snackbar. However, it has no effect on any component. Snackbar can only function properly when a CoordinatorLayout is present in your view hierarchy. 

In this article, you will learn how to create your Snackbar  Example of Snackbar in Android. So let’s take example of Snackbar  in Android of Mobile application.   

Example of Snackbar


Step-by-Step Implementation 

​Step 1: Create a New Project in Android ​studio (File >new  project).


Step 2: Create an main_activity.xml file in your layout folder . path (res>layout) 

Implement the same in​voke the following code inside main_activity.xml file.  

 <?xml version="1.0" encoding="utf-8"?>
<androidx.constraintlayout.widget.ConstraintLayout xmlns:android="http://schemas.android.com/apk/res/android"
xmlns:app="http://schemas.android.com/apk/res-auto"
xmlns:tools="http://schemas.android.com/tools"
android:id="@+id/main"
android:layout_width="match_parent"
android:layout_height="match_parent"
tools:context=".MainActivity3">
<androidx.appcompat.widget.AppCompatButton
android:id="@+id/btnsubmit"
android:layout_width="wrap_content"
android:layout_height="wrap_content"
android:layout_gravity="center"
android:text="Open Snackbar"
android:textAllCaps="false"
android:textSize="18sp"
app:layout_constraintBottom_toBottomOf="parent"
app:layout_constraintEnd_toEndOf="parent"
app:layout_constraintStart_toStartOf="parent"
app:layout_constraintTop_toTopOf="parent" />
</androidx.constraintlayout.widget.ConstraintLayout>
Step 3: Create an MainActivity.kt file in your layout folder 

Implement the same in​voke the following code inside MainActivity.kt file.

 import android.annotation.SuppressLint
import android.os.Bundle
import android.widget.Button
import android.widget.Toast
import androidx.appcompat.app.AppCompatActivity
import androidx.constraintlayout.widget.ConstraintLayout
import com.google.android.material.snackbar.Snackbar


class MainActivity : AppCompatActivity() {
@SuppressLint("MissingInflatedId")
override fun onCreate(savedInstanceState: Bundle?) {
super.onCreate(savedInstanceState)
setContentView(R.layout.activity_main4)
val btnsubmit = findViewById<Button>(R.id.btnsubmit)
val layout = findViewById<ConstraintLayout>(R.id.main)
btnsubmit.setOnClickListener {
val snackbar = Snackbar
.make(
layout,
"Are your sure to delete",
Snackbar.LENGTH_LONG
).setAction(
"UNDO"
)
{
Toast
.makeText(
this@MainActivity3,
"Undo Clicked",
Toast.LENGTH_SHORT
)
.show()
}
snackbar.show()
}
}
}
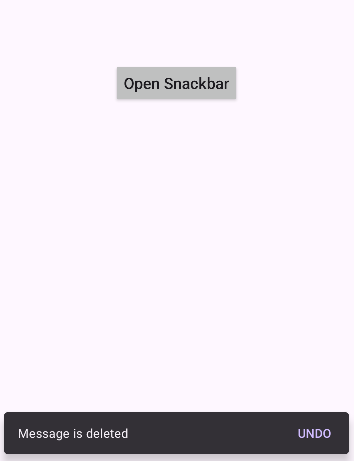
Step 4: Output of the above example.


Happy coding!

365Bloggy July 26, 2024
Share this post
Tags
SUBSCRIBE THIS FORM


Archive