How to Customize Toast in Android?

A toast is a communication for feedback. It only takes up very little room when displayed, sits atop an activity's main content, and is only visible for a little while. We will learn how to customise Toast in Android in this tutorial. Thus, to better grasp this, let's create a basic application that shows a Toast.

In this article, you will learn how to create your Toast in Android. So let’s take example of Toast codes  in Android of Mobile application.

Example of Toast
                                                                                             

 Step-by-Step Implementation
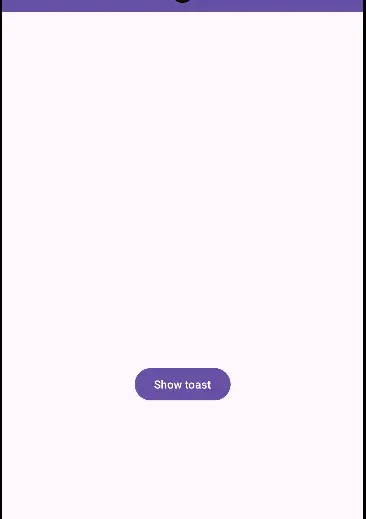
 Step 1: Create a New Project in Android ​studio (File >new  project). 


Step 2: Create an activity_main.xml file in your layout folder . path (res>layout)

Implement the same in​voke the following code inside activity_main.xml file. 

 <?xml version="1.0" encoding="utf-8"?>
<androidx.constraintlayout.widget.ConstraintLayout
xmlns:android="http://schemas.android.com/apk/res/android"
xmlns:app="http://schemas.android.com/apk/res-auto"
xmlns:tools="http://schemas.android.com/tools"
android:layout_width="match_parent"
android:layout_height="match_parent"
tools:context=".MainActivity">
<Button
android:id="@+id/btntoast"
android:layout_width="wrap_content"
android:layout_height="wrap_content"
android:text="Show toast"
app:layout_constraintBottom_toBottomOf="parent"
app:layout_constraintEnd_toEndOf="parent"
app:layout_constraintStart_toStartOf="parent"
app:layout_constraintTop_toTopOf="parent" />

</androidx.constraintlayout.widget.ConstraintLayout>
Step 3: Create an custom_toast.xml file in your layout folder . path (res>layout) 
Implement the same in​voke the following code inside costom_toast.xml file. 
 <?xml version="1.0" encoding="utf-8"?>
<LinearLayout xmlns:android="http://schemas.android.com/apk/res/android"
android:layout_width="match_parent"
android:layout_height="match_parent"
android:orientation="vertical">

<TextView
android:id="@+id/custom_toast_text"
android:layout_width="match_parent"
android:layout_height="wrap_content"
android:background="@drawable/round_corner"
android:gravity="center"
android:padding="10dp"
android:text="Custom Toast"
android:textColor="@color/white"
android:textStyle="bold"
android:typeface="serif" />
</LinearLayout>
Step 4: Create an MainActivity.kt file in your package folder .

Implement the same invoke the fol​lowing code inside MainActivity.kt file.

 import android.annotation.SuppressLint
import android.os.Bundle
import android.view.Gravity
import android.view.LayoutInflater
import android.view.View
import android.widget.Button
import android.widget.TextView
import android.widget.Toast
import androidx.appcompat.app.AppCompatActivity

class MainActivity : AppCompatActivity() {

lateinit var btn: Button
override fun onCreate(savedInstanceState: Bundle?) {
super.onCreate(savedInstanceState)
setContentView(R.layout.activity_main)
btn = findViewById(R.id.btntoast)
val text = "Candidroot Solutions"
btn.setOnClickListener {
showToast(text)
}
}

@SuppressLint("ResourceType")
private fun showToast(text: String) {
val toast = Toast(this)
val view: View = LayoutInflater.from(this).inflate(R.layout.custom_toast, null)
val textView = view.findViewById<View>(R.id.custom_toast_text) as TextView
textView.setText(text)
toast.setView(view)
toast.setGravity(Gravity.LEFT or Gravity.TOP, 400, 1000)
toast.duration = Toast.LENGTH_LONG
toast.show()

}
}

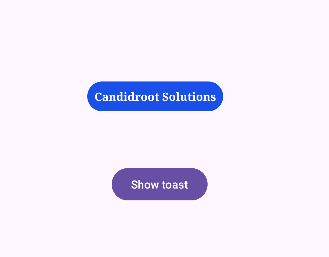
Step 5 : Output of above example.


Happy coding!                                                        

365Bloggy July 17, 2024
Share this post
Tags
SUBSCRIBE THIS FORM


Archive