RatingBar in Kotlin

Android RatingBar is a user interface widget used to collect ratings from customers or users. It is an expansion of SeekBar and ProgressBar that displays star ratings and allows users to leave ratings by clicking on the stars.

We may set the step size in RatingBar using android stepSize, and it will always provide a rating value as a floating point number, such as 1.0, 2.5, and so on. The android numStars feature allows us to set the number of stars in RatingBar.

In this article, you will learn how to create your ProgressBar widget in Android. So let’s take exmple of ProgressBar  in Android of Mobile application.


Syntax
 <RatingBar
android:layout_width="match_parent"
android:layout_height="wrap_content"
android:layout_margin="50dp"
app:layout_constraintBottom_toBottomOf="parent"
app:layout_constraintEnd_toEndOf="parent"
app:layout_constraintStart_toStartOf="parent"
app:layout_constraintTop_toTopOf="parent" />
Step-by-Step Implementation 

Step 1: Create a New Project in Android Studio (File >new  project). 


Step 2: Create an activity_main.xml file in your layout folder . path (res>layout)

Implement the same in​voke the following code inside activity_main.xml file. 

 <?xml version="1.0" encoding="utf-8"?>
<androidx.constraintlayout.widget.ConstraintLayout xmlns:android="http://schemas.android.com/apk/res/android"
xmlns:app="http://schemas.android.com/apk/res-auto"
xmlns:tools="http://schemas.android.com/tools"
android:id="@+id/main"
android:layout_width="match_parent"
android:layout_height="match_parent"
tools:context=".MainActivity">

<RatingBar
android:id="@+id/ratingBar"
android:layout_width="match_parent"
android:layout_height="wrap_content"
android:layout_margin="100dp"
android:numStars="5"
app:layout_constraintBottom_toBottomOf="parent"
app:layout_constraintEnd_toEndOf="parent"
app:layout_constraintStart_toStartOf="parent"
app:layout_constraintTop_toTopOf="parent" />

<androidx.appcompat.widget.AppCompatButton
android:id="@+id/button"
android:layout_width="wrap_content"
android:layout_height="wrap_content"
android:layout_marginTop="60dp"
android:text="submit"
app:layout_constraintEnd_toEndOf="@+id/ratingBar"
app:layout_constraintStart_toStartOf="@+id/ratingBar"
app:layout_constraintTop_toBottomOf="@+id/ratingBar" />

</androidx.constraintlayout.widget.ConstraintLayout>
Step 3: Create an MainActivity.kt file in your package folder .

Implement the same invoke the fol​lowing code inside MainActivity.kt file.

 import android.annotation.SuppressLint
import android.os.Bundle
import android.widget.Button
import android.widget.RatingBar
import android.widget.Toast
import androidx.appcompat.app.AppCompatActivity


class MainActivity : AppCompatActivity() {

@SuppressLint("MissingInflatedId")
override fun onCreate(savedInstanceState: Bundle?) {
super.onCreate(savedInstanceState)
setContentView(R.layout.activity_main)

val rBar = findViewById<RatingBar>(R.id.ratingBar)
if (rBar != null) {
val button = findViewById<Button>(R.id.button)
button?.setOnClickListener {
val msg = rBar.rating.toString()
Toast.makeText(
this@MainActivity,
"Rating is: " + msg, Toast.LENGTH_SHORT
).show()
}
}
}
}
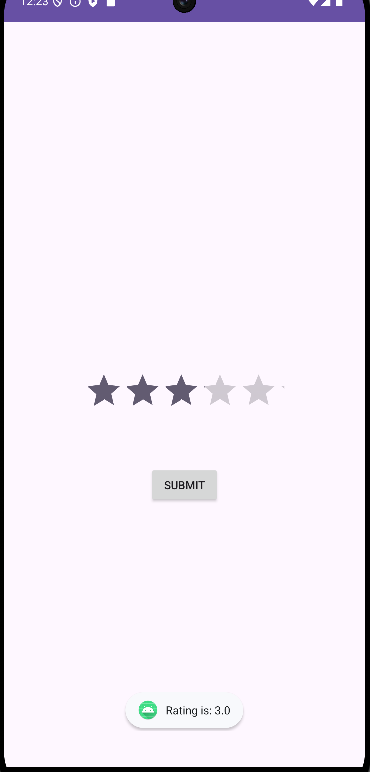
Step 4 : Output of above example


Happy coding!

365Bloggy July 15, 2024
Share this post
Tags
SUBSCRIBE THIS FORM


Archive