Wakelock - Flutter

Flutter's Wakelock package keeps the screen awake while in use. It can be altered based on the needs. These are fairly easy improvements that improve the quality and usability of the Mobile Application.

In this article, we'll look at how to keep the mobile screen active when you're not using the app. To do this, we will create a simple application with two buttons, namely:

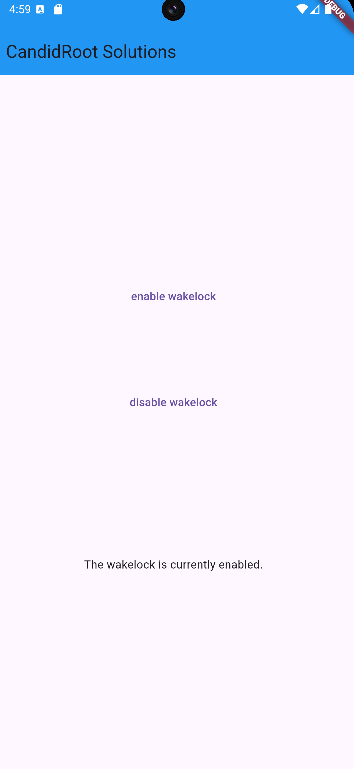
Enable wakelock: This prevents the phone screen from locking itself, regardless of how long it remains that way.
disable wakelock: This disables the application's wakelock capability.

In this article, you will learn how to create your wakelock  in  Flutter. So let’s take Wakelock widget​ example of the wakelock in  Flutter of Mobile application.

Screen shot example of wakelock mentioned below


Add package in pubspec.yaml
 dev_dependencies:
flutter_test:
sdk: flutter
flutter_speed_dial:
Creating an wakelock: 
 FutureBuilder(
future: Wakelock.enabled,
builder: (context, AsyncSnapshot<bool> snapshot) {
if (!snapshot.hasData) {
return Container();
}

return Text('The wakelock is currently '
'${snapshot.data! ? 'enabled' : 'disabled'}.');
},
)

Step-by-Step Implementation

Step 1: Create a New Project in Android Studio (File >new flutter project).
Step 2: Adding material package 

Import method the runApp method in the main function call first while run the  application.

 import 'package:flutter/material.dart';

 void main() {

     runApp(RunMyApp());

 }

Step 3: Creating a stateless widget   

We can create a stateless widget that contains MaterialApp widget,AppBar,etc.

 class RunMyApp extends StatelessWidget {

     const RunMyApp({super.key});  

    @override

    Widget build(BuildContext context) {

    return MaterialApp(home);

     }

 }

Step 4: Final code of Wakelock.
 import 'package:flutter/material.dart';
import 'package:wakelock/wakelock.dart';

void main() {
runApp(WakelockExampleApp());
}

class WakelockExampleApp extends StatefulWidget {
@override
_WakelockExampleAppState createState() => _WakelockExampleAppState();
}

class _WakelockExampleAppState extends State<WakelockExampleApp> {
@override
Widget build(BuildContext context) {
return MaterialApp(
home: Scaffold(
appBar: AppBar(
title: const Text('CandidRoot Solutions '),
backgroundColor: Colors.blue,
),
body: Center(
child: Column(
mainAxisAlignment: MainAxisAlignment.spaceEvenly,
children: <Widget>[
const Spacer(
flex: 3,
),
TextButton(
onPressed: () {
setState(() {
Wakelock.enable();
});
},
child: const Text('enable wakelock'),
),
const Spacer(),
TextButton(
onPressed: () {
setState(() {
Wakelock.disable();
});
},
child: const Text('disable wakelock'),
),
const Spacer(
flex: 2,
),
FutureBuilder(
future: Wakelock.enabled,
builder: (context, AsyncSnapshot<bool> snapshot) {
if (!snapshot.hasData) {
return Container();
}

return Text('The wakelock is currently '
'${snapshot.data! ? 'enabled' : 'disabled'}.');
},
),
const Spacer(
flex: 3,
),
],
),
),
),
);
}
}

Happy coding!

365Bloggy July 4, 2024
Share this post
Tags
SUBSCRIBE THIS FORM


Archive